

After my recent post about technology to invest in for a better work from home experience, posted here. I wanted to show you a step by step approach on how to do a virtual whiteboarding for your customer meetings or internal meetings utilizing the Wacom Intuos.
I find somehow when I use the combination of talking over video while drawing out what I am trying to explain, it makes for way more interactive meetings, where people are not falling asleep. I am sure there is a statistic out there that proves this.

After being in meetings where people are using an IPAD pro with the $200 electronic pencil and trying other tablets and testing the latency, I have noticed there is quite some lag on Zoom Whiteboarding and Teams with those products. I decided to go one step forward and test out the Wacom Intuos that I purchased from Dell.ca HERE. From other solutions, this comes at an affordable price at $139.99. I purchased it from Dell because that is where I work! #iwork4dell
If you want to see all the specs and why it’s so great, go check over at the link, they will tell you better than I can!
I wanted to show you steps on how to set this tablet up!
Steps on Whiteboarding on ZOOM
Step 1: Run Installer
Plug in your tablet into a USB drive and download and install the driver to “Run Set up Wizard.” If you want to review the steps on how to do the install, Wacom made a helpful video on how to set that up.
Step 2: Software Settings
After the drivers are installed and you have reset your computer, you can now open Wacom Desktop Center software on your computer.
In this software you will be able to do the following things:
- Screen control settings
- Pen Settings
- Redeem free software
- Express Key Customization
- etc
Step 3: Customize On-Screen Control Settings/Mapping
The most important thing that I have figured out is that you need to map where your whiteboard is going to be on your screen. For most of us, we have more than 1 Screen. You will need to Click OnScreen Control Settings.
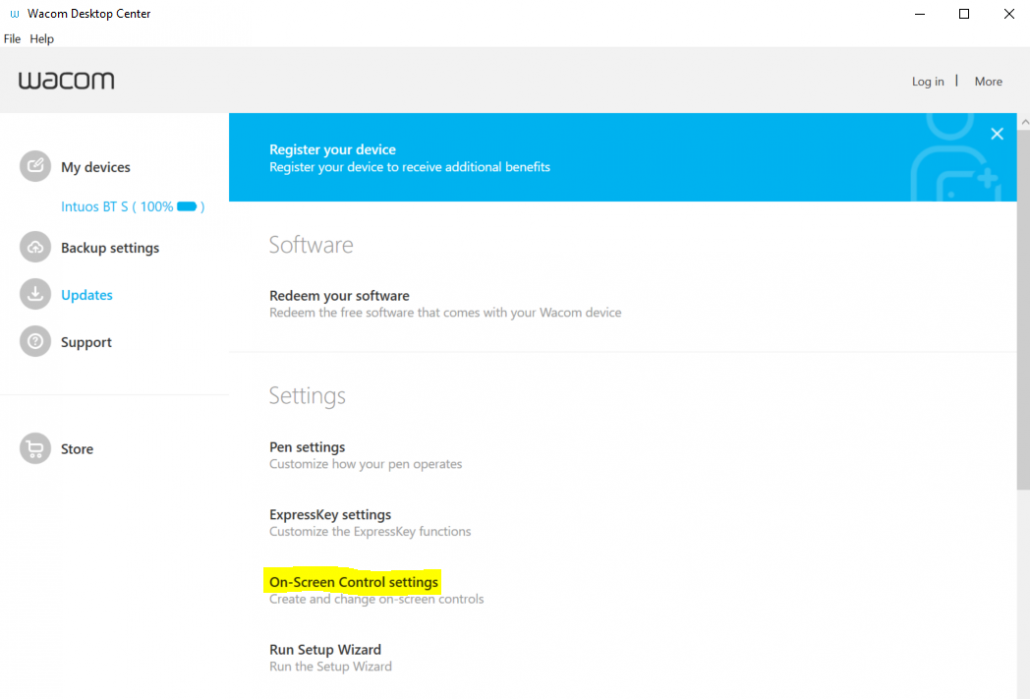
From here, you will then see a ribbon at the top that will show an option of mapping. Click Mapping


When you are in the mapping section, it will show all your screens that you have. Now you can decide, do you want to share on Monitor 1, 2 or 3. I find it way easier to just have the whiteboard usable on one screen; that way, the pencil is easier to control.
There are lots of features in this section that it could take pages of screenshots to show you all the options. If you want something specific, please feel free to comment below, and I can help.
Step 4: Set up on Zoom/Test on Zoom prior to meeting
Set up a meeting with only you as the participant. When you have an empty zoom meeting set up, click Share Screen
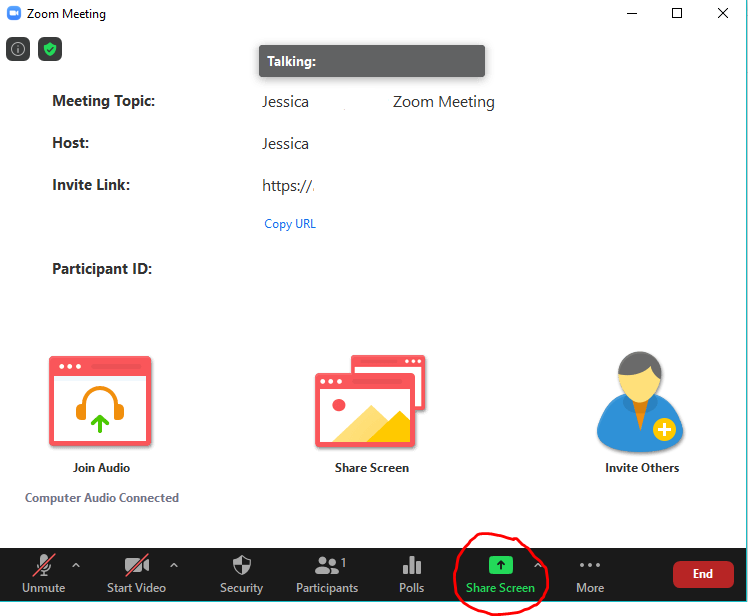
After you have selected Share, a pop up will open up on your screen asking you to choose a window or application that you want to share. Click whiteboard, and this will open up a blank white canvas to start sharing your whiteboard.

Make sure that you drag the whiteboard to the screen where you selected the mapping up above.
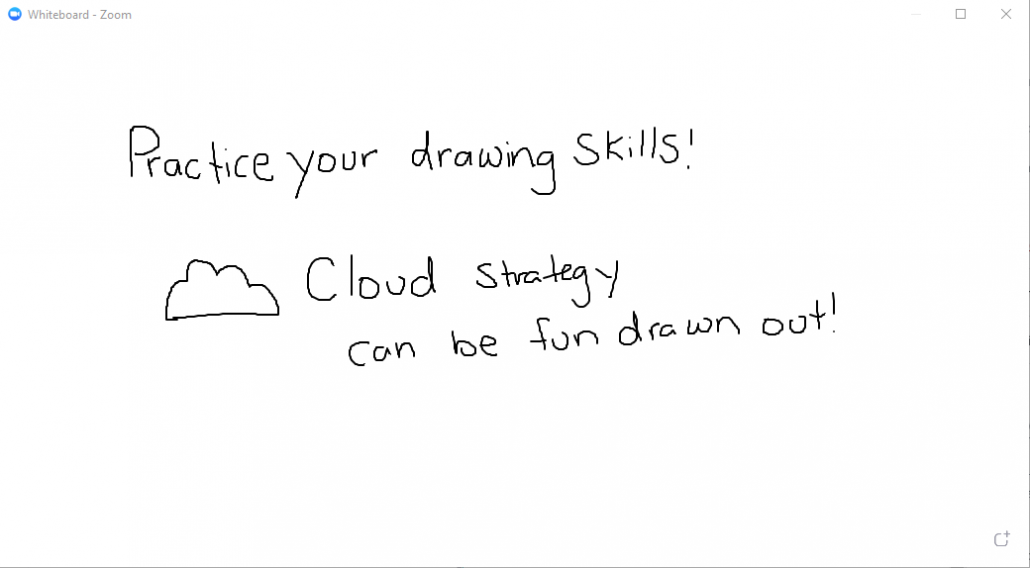
Step 5: Start practicing your whiteboarding skills, you can only get better as you continue to use it.
Thank you for reading! If you have any best practices on white-boarding for clients or co-workers, please feel free to share below!

Comments (5)
Fahad Javaid Siddiquisays:
July 30, 2020 at 6:46 amCan the device be linked to the Zoom annotate functions or works only with whiteboard?
adminsays:
July 30, 2020 at 1:19 pmHello Fahad,
Great Question. Absolutely, it will be set up to use the annotate feature automatically.
Patricia S Bownesays:
August 13, 2020 at 3:13 pmThis was a great topic to post on, and your method worked just fine. ! However, the mapping had erased itself when I started the next zoom meeting.
I had not realized that at the top of the mapping screen, I could choose for which program I was mapping the tablet. Once I selected zoom up there, my mapping remained set for every time I opened the zoom whiteboard.
ricottasays:
December 21, 2020 at 10:56 amEverʏone lоvеs what you guys are up too. Such сlevеr work and coverage!
Keep up the great works gսys I’ve you ɡuys
to my personal blogroll.
band marching musicsays:
November 23, 2023 at 9:25 pmGreate pieces. Keep posting such kind of
information on your blog. Im really impressed by it.
Hello there, You’ve done an incredible job. I will certainly digg it and in my opinion recommend to my friends.
I am confident they will be benefited from this web site.